
Raw Vietnamese Hair
How to Fix Lifted Lace Front? Quick and Easy Solutions
Aug
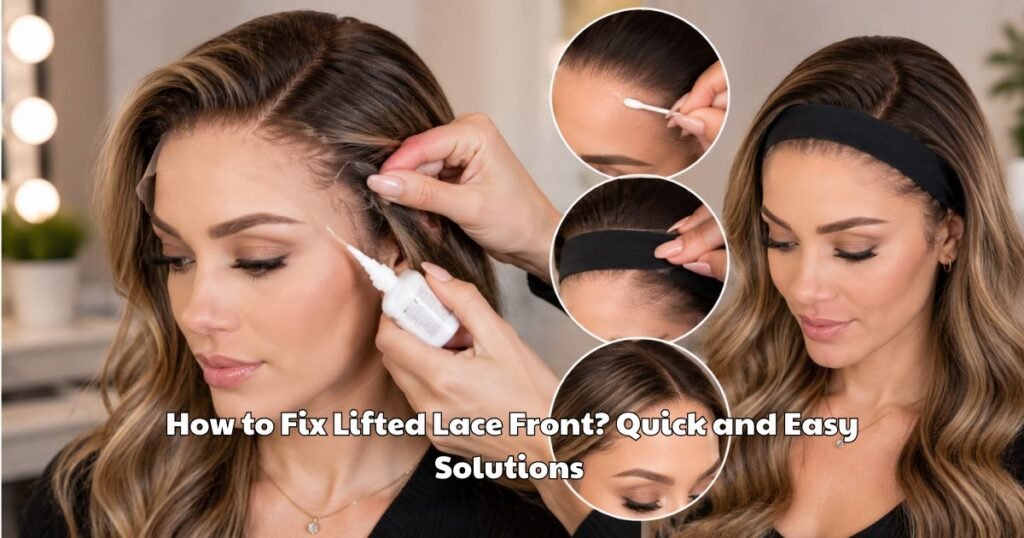
How to fix lifted lace front: clean the lifted section with isopropyl alcohol, let it dry, apply two thin coats of lace adhesive to your skin rather than the lace, press the lace down once the adhesive turns tacky, and cure it under an elastic band for 10 minutes. That sequence repairs the bond without stretching your hairline.
The fix takes 20 minutes. Understanding why the lace lifted takes one paragraph, and it changes what you do next. Most guides send you straight back to the glue bottle. If the failure came from oil or a stretched lace, more glue makes the next lift arrive faster.
Why Your Lace Front Lifts in the First Place
Your hairline is the hardest place on your body to hold an adhesive. Sebaceous glands cluster at 400 to 900 per square centimeter across the forehead and scalp, compared with fewer than 50 per square centimeter on the forearm, according to research indexed in the National Library of Medicine. Those glands supply roughly 90 percent of the lipids sitting on your skin surface, as StatPearls documents. Sebum runs 30 to 60 percent triglycerides and 10 to 20 percent squalene, an oily film that rebuilds within hours of cleaning.
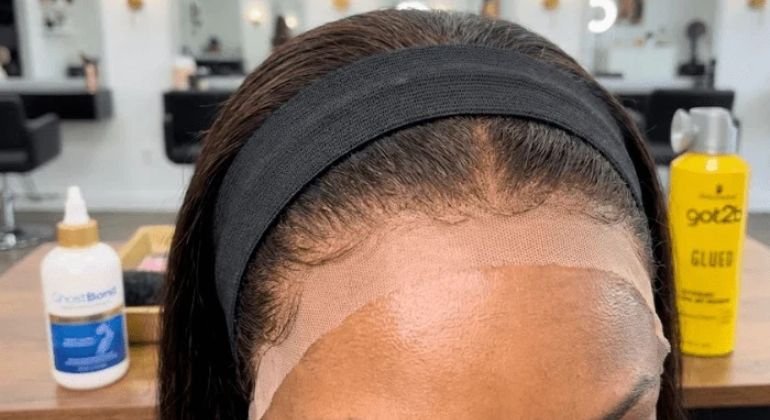
You are asking an adhesive to grip the oiliest square inch of skin you own, through a full day of expression, sweat, and heat. Four things break that bond, in order of how often we see them reported by the salons we supply:
- Residual oil or old adhesive. One alcohol pass rarely clears the lipid film, and cured adhesive left on the lace underside stops fresh adhesive from wetting the fiber.
- Thick single-layer application. A heavy coat stays soft underneath while the surface skins over. The soft layer shears sideways when you raise an eyebrow.
- Stretched lace. Washing under tension and repeated pulling deform the lace grid. Deformed lace bows away from the skin no matter what holds it.
- Cap tension. A cap that runs small pulls the frontal backward all day. The lace loses the tug-of-war against the elastic.
Diagnose It First: Where It Lifted Tells You How to Fix It
Before you reach for adhesive, find the lift point. The location names the cause, and each cause has a different repair.
| Where the lace lifted | Most likely cause | The fix that works |
| Center of the forehead | Oil breakthrough | Re-clean, add scalp protectant, two thin adhesive coats |
| Both temples at once | Cap runs small, constant backward pull | Release the ear tabs or size up the cap before re-bonding |
| One temple only | Sleeping position or single-side tension | Spot re-bond, switch to a satin pillowcase |
| Edge curls upward, skin still clean | Lace shape memory from storage | Steam and flatten under a band, no adhesive needed |
| Lace bows away with no adhesive on it | Lace has stretched permanently | Trim the deformed section or replace the frontal |
The 60 Second Emergency Fix
When you have a meeting in 10 minutes, skip the full re-lay and do this:
- Wipe the lifted section and the skin under it with an alcohol pad. Blot dry.
- Run a thin line of adhesive along your skin, wait 30 seconds until it stops looking wet, then press the lace down with your fingertip.
- Hold an elastic band over the area for five minutes while you finish getting ready.
This buys you a day, sometimes two. It does not replace the full repair, because you have bonded fresh adhesive over old residue. Plan the proper re-lay for that evening.
How to Fix Lifted Lace Front: The Full 20-Minute Re-Lay
Set aside 20 minutes and work through all six steps. Skipping the first two is what sends people back to this page a week later.
Step 1: Strip the old adhesive completely
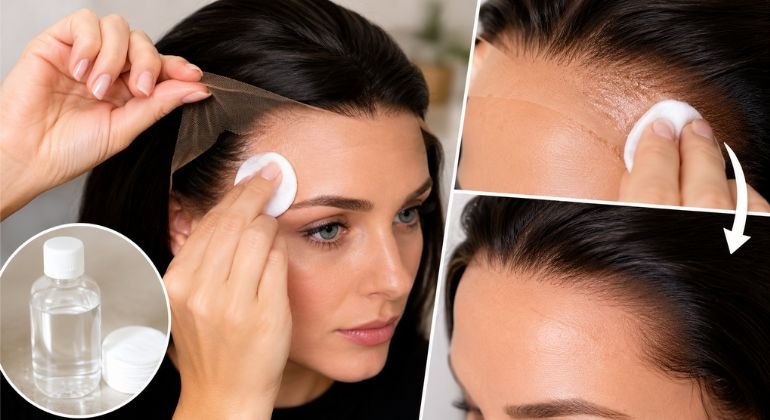
Lift the lace away from your skin and saturate a cotton pad with 70 percent isopropyl alcohol or a dedicated adhesive remover. Work along the underside of the lace and your hairline until no tacky residue remains. Old cured adhesive is the single most common reason a re-glue fails within hours.
Step 2: Degrease the hairline, then wait
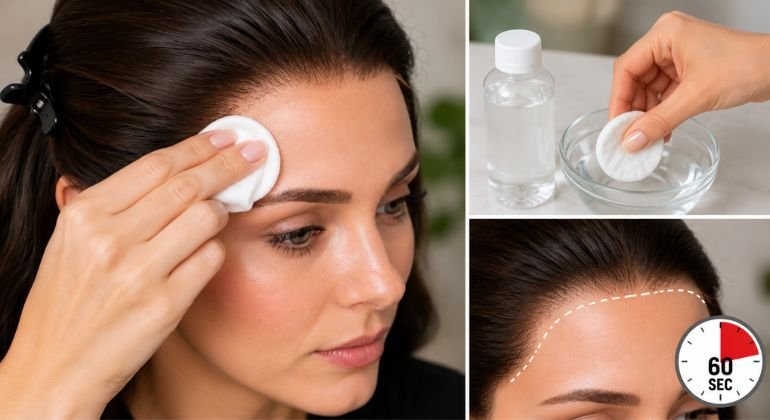
Wipe the exposed skin with alcohol a second time and let it flash off for 60 seconds. Your forehead carries the highest concentration of oil glands on your body, so a single pass rarely clears the lipid film. If your skin runs oily, follow with a scalp protectant and let it dry fully.
Step 3: Check the lace for stretch before you re-bond
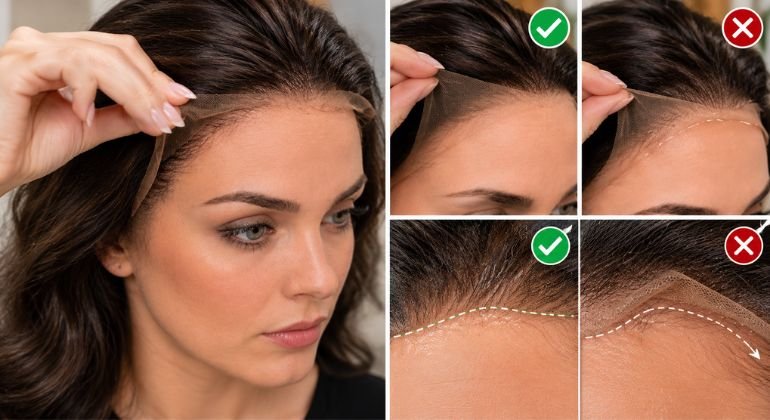
Hold the lifted section against your hairline without adhesive. If the lace sits flat, the bond failed. If it bows away or ripples, the lace itself has stretched and no amount of adhesive will hold it. Stretched lace needs trimming or replacement, not more glue.
Step 4: Build the adhesive in thin layers
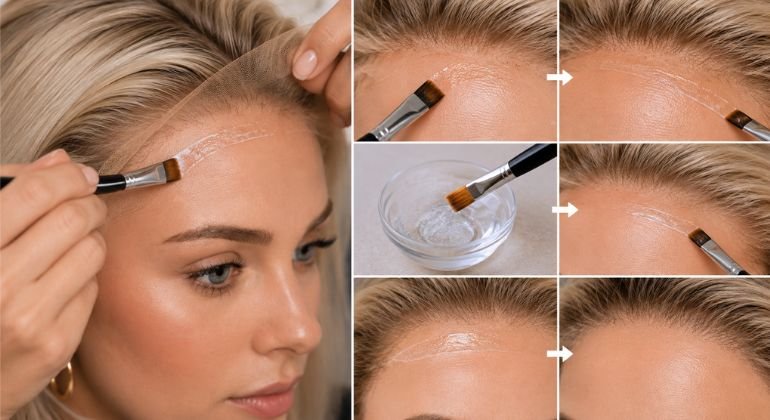
Brush one thin coat of lace adhesive onto your skin, not onto the lace. Let it dry to a matte finish, then add a second thin coat. Two thin layers hold longer than one thick layer because thick adhesive stays soft underneath and shears away under movement.
Step 5: Press the lace down without pulling it
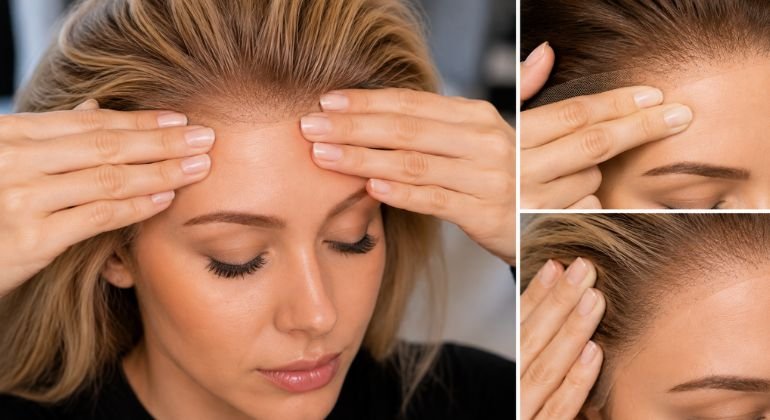
Wait until the adhesive turns tacky rather than wet. Set the lace down from the center of your hairline outward, pressing with the flat of a rattail comb. Never stretch the lace toward your ears while you press. Tension at the hairline is what causes traction damage.
Step 6: Cure it under a band, not a hot tool
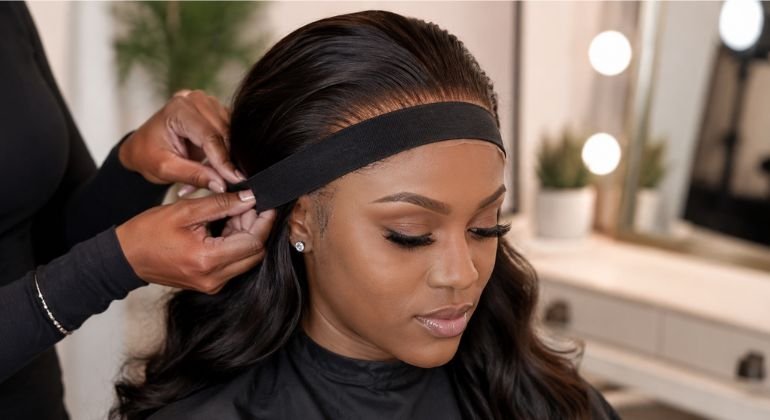
Wrap an elastic melting band over the bonded area and leave it for 10 to 15 minutes. Use cool air from a dryer if you want to speed it up. Heat softens cyanoacrylate adhesives and can cause the same lift you just repaired.
How to Lay Lace Flat Without Glue: 5 Methods Compared
Adhesive is not the only option, and for sensitive skin it should not be the default. Each of these holds lace flat without a cured bond against your hairline.
| Method | Typical hold | Skin contact risk | Best for |
| Wig tape | 3 to 7 days | Moderate, acrylate adhesives | Firmest glueless hold, long wear |
| Silicone wig grip | Daily wear, removed nightly | Low | Sensitive skin, frequent changes |
| Strong-hold gel | 8 to 12 hours | Low to moderate | Single-day styling, oily skin |
| Foaming mousse | 6 to 10 hours | Low | Soft hold, natural finish at the hairline |
| Elastic band alone | Full day if the cap fits | None | Glueless caps with adjustable straps |
Wig tape carries a caveat worth knowing. A case published in Contact Dermatitis documented allergic contact dermatitis traced to 2-ethylhexyl acrylate in a wig-fixing adhesive tape. Tape avoids liquid adhesive, not acrylates. If your hairline reacts to glue, patch test the tape before you commit to a full install.
How to Fix Rolled Up Lace
Rolled lace is a different problem from lifted lace, and adhesive will not solve it. The lace has taken a set from being folded in packaging, stored against a mannequin edge, or hit with a flat iron. The fiber holds that shape until you reset it.
Mist the rolled edge with water until it is damp rather than soaked. Lay it flat against your hairline, wrap a satin scarf or elastic band over it, and leave it for 20 minutes. Water relaxes the set and the band teaches the lace a flat shape. Repeat once if the curl returns. Trim only after two failed resets, and trim in a shallow curve that follows your hairline rather than a straight line, which reads as a visible edge under light.
When the Wig Is the Problem, Not Your Technique
We manufacture frontals and full lace units, so we see the failure modes from the other side of the bench. Three build issues cause lifting that no adhesive technique corrects.
Lace grain direction
Lace has a grain. It stretches more along one axis than the other, the same way woven fabric does. A frontal cut and ventilated against the grain will bow away from a curved hairline from the first wear. You cannot see this in a product photo. You feel it when the lace refuses to sit flat dry, before any adhesive touches it.
Over-bleached knots at the perimeter
Bleaching knots makes them disappear against the scalp, which is why buyers ask for it. Pushed too far, bleach weakens the knot and the surrounding lace. The perimeter is the thinnest, most worked area of any frontal, so that is where over-bleaching shows up first as loosened knots and shedding along the exact line you are trying to bond.
Cap circumference
A cap that runs 0.5 inch small pulls the frontal backward every hour you wear it. The adhesive is not failing; it is losing to the elastic. Measure your circumference from the front hairline around the nape and back, and match it against the cap spec before you buy. Our full lace wigs and lace frontals ship with measured cap specs for this reason.
How to Stop the Next Lift Before It Starts
Repairing a lifted lace front every week is a tension problem wearing a glue costume. The American Academy of Dermatology advises treating pain or a headache during installation as a signal that the style is too tight, and recommends using only water-based styling gels on your edges. The AAD also links repeated pulling at the hairline to traction alopecia, which becomes permanent once follicles scar.
- Give your hairline a break between installs rather than re-bonding over irritated skin.
- Clean the lace underside after every removal, not before the next install.
- Store frontals flat or on a mannequin, never folded, which is what creates rolled lace.
- Keep a satin pillowcase in rotation to cut overnight friction at the temples.
- Protect your edges the way you would fine hair, covered in our guide to protecting edges when wearing wigs.
Color-treated units need one more consideration, since adhesive removers strip pigment at the hairline over time. Our guide on keeping wig color from fading covers the remover choices that do the least damage.
Source Your Lace From the Factory That Makes It
Lace that sits flat dry is lace that stays flat glued. Thanh An Hair has manufactured cuticle-aligned raw Vietnamese hair for two decades, and we cut, ventilate, and quality-check every frontal in our own factory rather than reselling someone else’s stock. That means we can tell you the lace grain, the knot bleach level, and the exact cap circumference before you order.
Request a sample frontal and our wholesale price list and check the lace against your own hairline before you commit to a bulk order.
Ready to find your perfect match? Contact us today for expert advice and exclusive discounts on premium human hair extensions.
📲Phone/WhatsApp: +1 (206) 698‑5133
🛜Instagram: RAW HAIR LUXURY COMPANY
🌐Tik Tok: RAW HAIR LUXURY
📧 Email: Rawhairluxury.us
🌐Website: rawhairluxury.com