Raw Vietnamese Hair
How to install Clip In Hair Extensions like a pro stylist
Nov
Ever dreamed of long, voluminous hair without hours at the salon? The secret is learning how to install clip in hair extensions properly. Unlike permanent methods, clip-ins are quick, safe, and give you the flexibility to transform your look in minutes. Whether you’re a beginner or aiming for professional-level results, this guide will walk you through the exact steps, plus tips on maintenance and choosing the right set.
Clip In Hair Extensions Overview
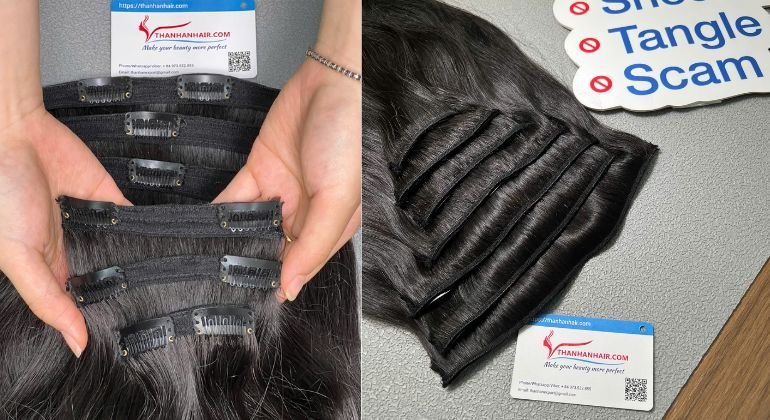
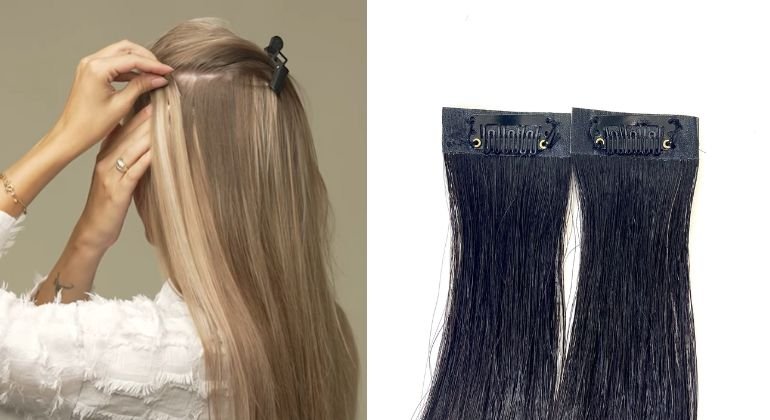
Clip in hair extensions are a temporary hair solution designed as wefts with built-in metal clips lined with silicone pads. These clips secure firmly to natural hair without the need for glue, heat, or professional tools, allowing anyone to add instant length and volume at home.
Key highlights include:
- Material: 100% Remy human hair, soft, smooth, cuticle-aligned, tangle-free, and shed-resistant.
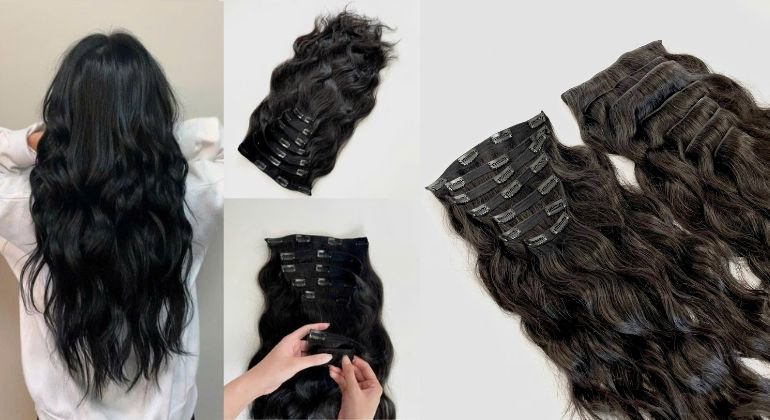
- Design: Flexible sets with multiple wefts of different widths (1-clip, 2-clip, 3-clip, 4-clip…). Standard sets often include 5 or 7 wefts.
- Variety: Lengths range from 12–28 inches, with weights from 100 – 250 grams per set. Available in a wide spectrum of colors (natural black, Asian, European tones, balayage, piano, ombre, custom shades) and textures (straight, wavy, curly, sleek styles).
- Convenience: Easy to apply, remove, and store. Can be reused hundreds of times with proper care.
Affordable, versatile, and suitable for all hair types, clip-ins are a go-to choice for individuals, salons, and retailers alike. They offer a quick beauty upgrade.
>>> Check this out: Clip In Hair Extensions: The Secret to Transforming Your Hair in Minutes
Tools and preparation
As any stylist will confirm, preparation determines the outcome. To master how to install clip in hair extensions, gather these essentials:
- Clip-in hair extensions (various weft sizes)
- Tail comb for clean, sharp partings
- Sectioning clips to hold layers in place
- Detangling brush for smoothing before and after
- Heat protectant spray if using irons or curlers
- Mirror (a double mirror setup helps see the back)
Prepping Your Hair
- Wash & dry: Start with clean, dry hair (extensions grip better without oil buildup)
- Straighten or curl first: Decide on your final look before installation. Curling together afterward is possible but blending is often easier if both are pre-styled.
- Tease roots (Optional): If your hair is silky or fine, gently tease roots where clips will sit to prevent slipping.
Step-by-Step: How to Install Clip In Hair Extensions
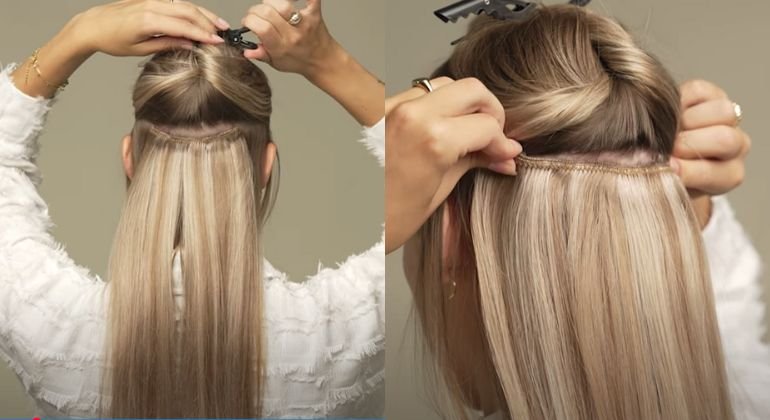
Step 1: Prep and Section Your Hair
Always start with smooth, detangled hair. Use a wide-tooth comb or paddle brush, working from ends upward to remove knots without causing breakage. If your hair is fine or silky, lightly teasing the roots or spraying a bit of texturizing spray gives the clips more grip.
Next, part your hair horizontally across the nape of your neck (from ear to ear) and clip the rest up. This creates the foundation for your first weft.
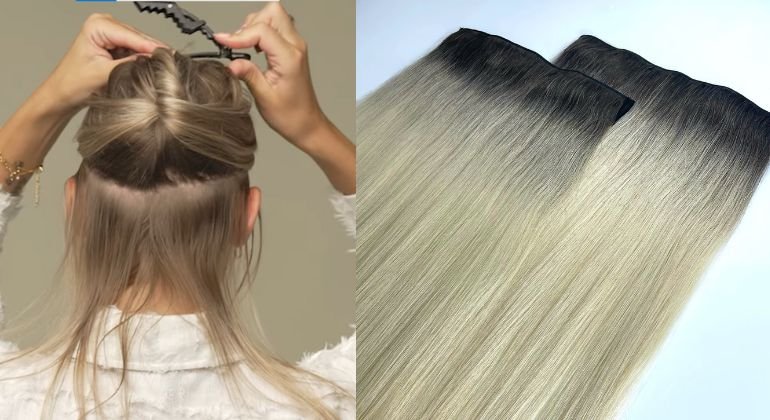
Step 2: Install the First Weft at the Nape
Take a small 2 – 3 clip weft and brush it through to remove tangles. Snap the middle clip into your roots first, then secure the side clips. Keeping the weft snug against your scalp prevents gaps and ensures a natural fall.
Pro tip: If you have very fine hair, backcombing the root section slightly before clipping adds extra hold.
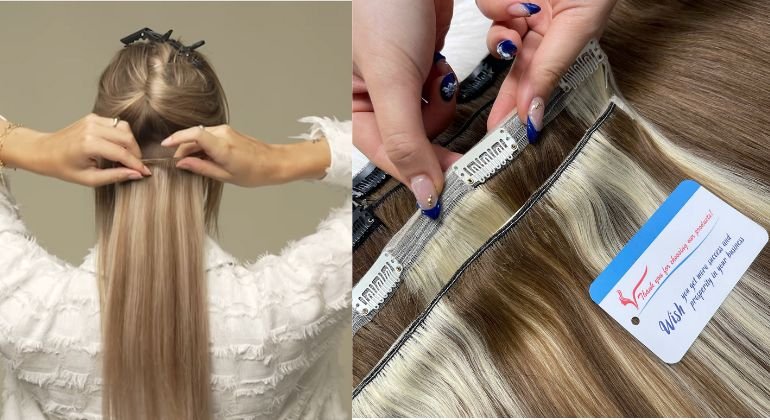
Step 3: Layer with Larger Wefts
Work your way up the back of your head, releasing new horizontal sections about an inch above the previous one. Each time, apply a wider weft (3 – 4 clips) to match the increasing width of your head shape. Continue until you reach just below the crown.
This “stacking” method distributes volume evenly, so your extensions feel comfortable and look balanced.
Step 4: Add Side Wefts for Framing
Move to the sides of your head. Create a small horizontal section just above your ear and attach a 1–2 clip weft, starting near the hairline. Repeat on the other side. These side wefts help the extensions blend seamlessly with your natural layers around the face.
Step 5: Fill in with Single Clips
Use single-clip wefts wherever you need a little extra density, around the temples, at the crown, or near thinner sections of your hair. This step isn’t always necessary, but it’s perfect for customizing your look and achieving flawless coverage.
Step 6: Blend and Style
Release the top section of your natural hair and gently brush everything together. The goal is to merge the extensions with your own strands so they’re undetectable.
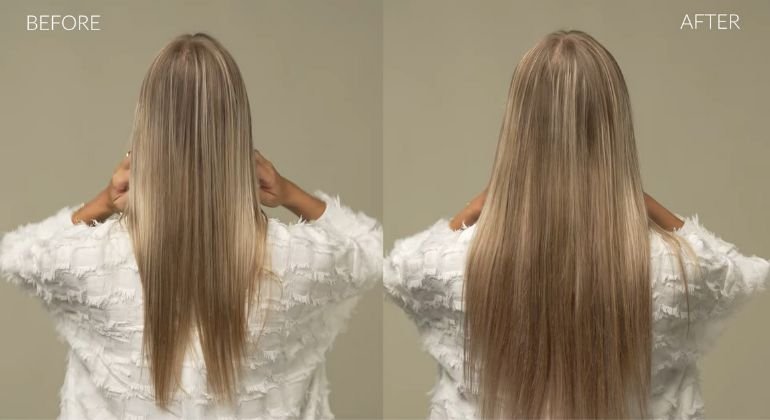
Now you’re ready to style: straighten for a sleek finish, curl for natural bounce, or wave for effortless texture. Always use a heat protectant when styling with hot tools, and brush extensions together with your natural hair to keep them smooth.
How to Maintain Clip In Hair Extensions?
Installing your clip in hair extensions correctly is only half the journey, proper care is what keeps them looking silky, voluminous, and natural for months or even years. Unlike permanent methods, clip ins don’t stay attached to your head 24/7, which means you control their longevity. With the right maintenance, a good set can easily last over a year. Here’s a stylist-approved guide:
1. Gentle Brushing Is Essential
Always brush your clip in hair extensions before and after each wear. Start at the ends and slowly work your way up to avoid pulling or shedding. A wide-tooth comb, detangling brush, or loop brush is best since these tools reduce friction and protect the cuticles.
2. Wash Them Sparingly
Unlike natural hair, extensions don’t benefit from frequent washing. Clean them only after 15–20 wears, or when product buildup becomes noticeable. Over-washing can strip away natural oils, leaving the hair dry. Use lukewarm water, sulfate-free shampoo, and a hydrating conditioner. Always wash them gently in a downward motion.
3. Deep Conditioning Is a Must
Extensions don’t receive natural scalp oils, so hydration is key. Apply a deep-conditioning mask or leave-in treatment after every wash to restore softness and shine. Focus on mid-lengths to ends, avoiding the clips and seams.
4. Limit Heat Styling
Clip in hair extensions are usually made of 100% human hair, which means you can curl or straighten them but excessive heat shortens their lifespan. Always use a heat protectant spray and stick to moderate temperatures. For longevity, alternate heat styling with heatless methods like braids or rollers.
5. Store Them Properly
Never toss your extensions into a drawer. After each use, brush them out and store them in a breathable fabric bag, silk pouch, or dedicated extension hanger. This keeps them tangle-free, dust-free, and ready to wear.
6. Handle With Care When Wet
Wet extensions are fragile. Avoid brushing them while damp, and instead, gently squeeze out excess water with a microfiber towel. Let them air-dry flat on a towel or hang them up, never blow-dry on high heat.
7. Protect Them From Friction
Just like natural hair, extensions can suffer from frizz and breakage. Avoid sleeping or swimming in your clip in hair extensions. At night, always remove them to prevent tangling. If you’re outdoors in harsh weather, consider braiding them lightly to reduce friction.
8. Avoid Heavy Products
Stick to lightweight, alcohol-free products. Heavy serums, oils, and sprays can weigh extensions down, cause buildup, and shorten their lifespan. A light mist of leave-in conditioner or detangling spray is usually enough.
9. Maintain Hygiene Around Clips
While washing, take care not to soak the clips excessively. Wipe them dry with a soft cloth after cleaning. This prevents rusting or loosening, ensuring the wefts stay secure every time you wear them.
10. Rotate and Rest
If you wear clip in hair extensions daily, consider having more than one set. Rotating them allows each set to rest, reducing wear and tear and keeping them looking fresh longer.
>>> See more: Seamless Clip In Hair Premium Quality Vietnamese Hair Extensions
Where to Purchase Clip In Hair Extensions
The quality of clip in hair extensions affects both their appearance and durability. Choosing the right supplier is just as important as proper installation. When you purchase clip in hair extensions, always look for 100% Remy human hair with secure stitching and silicone-lined clips to ensure a smooth, tangle-free, and comfortable fit.
It’s also essential to purchase clip in hair extensions from a supplier that offers a wide selection of lengths, textures, and shades while backing their products with strong customer service and professional support. This ensures a seamless experience from purchase to long-term use.

At Thanh An Hair, we take care of all your concerns from start to finish. We are Vietnam’s premier provider of hair extensions and wigs, with over 20 years of experience in the industry and a verified Alibaba account that has been active for over 13 years. We currently work with over 500 salon owners, hairstylists, and hair suppliers worldwide. We are confident in our position as a top brand, providing the finest customer experience in terms of product quality and affordability.
Contact Thanh An Hair now for expert consultation and the best price list.
🌍 100% Vietnamese Human Hair – Consistent Quality
📦 Ready Stock – Fast Global Shipping
🤝 Competitive Pricing – Flexible for Every Order
👉 WhatsApp: (+84) 973522855
👉 Instagram: THANH AN HAIR WHOLESALE MANUFACTURER
👉 TikTok: Thanh An Hair
👉 Email: thanhanexport@gmail.com